Showing posts with label kids' rooms. Show all posts

Sunday, July 29, 2012

Toy Rotation - Update

We've been really enjoying our toy rotation this summer.  It's been so HOT that we've spent a lot of time escaping to our basement playroom.  Keeping up with the toy rotation has helped keep the room enjoyable.  (If you missed our first toy rotation post, you can check it out here.)

I've been working on fine tuning some aspects of the rotations. One area that we are tweaking is the number of toys for each rotation, particularly when it comes to sets and accessories.  I've found that the number really depends on which toys are in rotation.  For example, during the month of July my kids played with ONE toy - their Little Tykes Bounce House.  I also discovered that my kids do not want dress up clothes out of rotation (they threatened mutiny).  Now I choose 5 or 6 outfits each rotation so that they always have dress up clothes, but they change from time to time.

I also tried working in invitations to play.  On my second toy rotation, I turned the playroom into a store.  I added a shopping cart, turned the shelves to resemble aisles in the store and set up a table with a cash register.  I even included some posterboard and markers for the kids to create signs for their store.  The great part about this set up was that I stocked the shelves with the chosen 9-10 toys for that rotation.  They could choose to use those things as their store inventory or just play with them if they didn't feel like playing store.

Here's a picture of our current rotation:
Playroom Toy Rotation
Our most recent toy rotation

Playroom Toy Rotation
Five dress up outfits seems to be the right fit for the 3 oldest.

Playroom Toy Rotation
On this shelf: dollhouse vehicles, marble maze set, and 2 totes of dollhouse accessories (one for people and one for furniture)

Playroom Toy Rotation
On this shelf: K'nex, magnadoodle, hopscotch and doctor kit

The breakdown of toys is as follows:

Moving:
  • Stick horses 
  • Hopscotch set (bottom shelf - not put together) 
  • Dollhouse vehicles
Pretending:
  • Doctor kit 
  • Dress up clothes 
  • Dollhouse village
Thinking: 
  • Magna Doodle 
  • K'nex 
  • Marble Run Maze

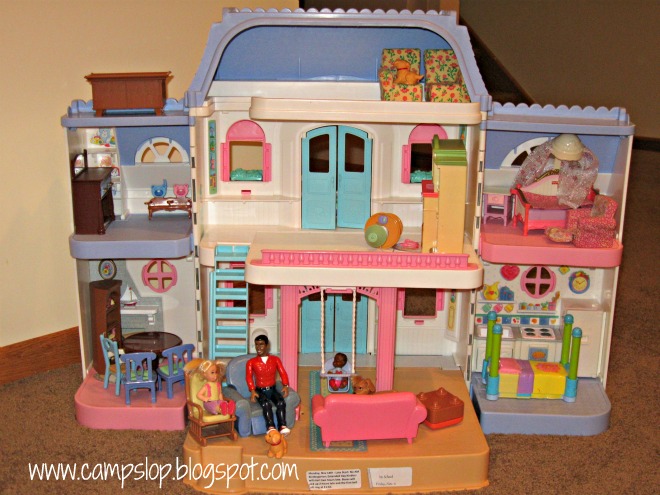
Now, I know you might be thinking - "What's with all the dollhouses?"  I acquired all of these dollhouses without really meaning to. Two of them were gifted to us as hand-me-downs, and one I picked up at a garage sale for $1. I intended to keep one and donate the other two, but the kids and I could never agree which to keep and which to donate. The kids LOVE to set up all 3 houses and play "neighborhood" with them. They were thrilled to see that I allowed all 3 dollhouses to stay and put them into rotation at the same time. We'll see how it goes.

The totes on the shelves contain the pieces to the houses - blue for people, red for furniture. I am still unsure on the "perfect" number of accessories for toys like the dollhouse.  Pinky certainly prefers to have more so that each room can be decorated, while Wild One would be happy with a mama, a baby and a crib.  I guess only time will tell how this rotation will work for us.  I will keep you updated!

Friday, April 20, 2012

Playroom Toy Organization

For a long time, I have been struggling with the issue of too many toys. With 4 kids, 2 sets of grandparents who love to send gifts, and my personal love for garage sales, there has been a constant flow of new toys in our house. It felt as though we were drowning in toys. No where was this felt more than in our playroom.

playroom toy organization organizing toys before
While the kids loved to play down here, it became a source of stress when every tote, bucket or bin would be emptied on the floor (you can see that the totes were so full of toys that some of them wouldn't even fit on the shelves).


When it was time to clean up (and at times it felt as though the toys were ankle deep), the kids would become overwhelmed. Then, we would argue. We would yell. We would threaten. We would help clean up. We vowed to not buy more toys. We promised we would get rid of some toys. But nothing worked.


Then one day I read a great article about rotating toys. The article "How to Rotate Toys" on the Little Stories blog is really great reading. I highly recommend checking it out.

Almost as soon as I finished reading I grabbed some (okay, a LOT) of Rubbermaid bins and dumped every. single. toy. into the center of the room and started sorting.


The mess wasn't pretty, and a few times I questioned my sanity for taking on a project of such magnitude., but I persevered.

I immediately weeded out any toys my youngest had outgrown, toys that were broken, or toys that had come from McDonalds or other cheap/trinkety type toys. To be honest, I didn't really get rid of anything else. I was very fearful that the kids wouldn't like the new playroom and wanted to be sure I could "go back" if I needed to.

To sort the toys, I put sets together inside plastic freezer bags and labeled them along with the number of pieces included (to make it easier when they were rotated out).


I added signs to the outside of the totes that outlined exactly what was inside. I tried to avoid generic labels, for example, labeling "Little People Farm" and "Little People Garage" instead of just "Little People." (I plan to show you my storage area in a future post.)

Once every toy was packed away and organized (including large items like the play kitchen and washer/dryer set), I made a list of which toys I wanted to include in our first rotation. I listed each child's name and, under it, each category that Kim included in her article. I tried to make the toys overlap between kids as much as possible.


Finally (the part I had been looking forward to), I got to work setting up the chosen toys. I was VERY nervous about how the kids would react. I had told them I was working on making the playroom even better, but I was certain there would be tears or protests about the finished product.

I unveiled the "new" playroom to the kids about a week ago. I am happy to say they LOVED it. I know they loved it because they wouldn't stop telling me how much they loved it. I made sure to bring out a few toys that they hadn't played with in awhile (and the ball pit was my insurance policy that something in the room would be awesome for them, just in case there were tears).
organizing rotating toys after

Here's a close up look of what's on the shelves:

Little People Farm and an additional animal/farm set, Peek a Blocks gumball machine, My First Purse, Mr. Potato Head and a Playmobil safari animal set


Puzzles, Dora school set, wedgits and 2 large Tonka trucks


Fisher Price Loving family dollhouse (Wild One decorated this one for me).

Also "on rotation" but not in the close up pictures - a ball pit and a tunnel.

After nearly a week, the kids are still just as happy with the room. They have been playing longer, with less complaints about cleaning up. And to my amazement - they've been playing with fewer fights too! For my husband and I, the room feels calmer and more inviting - a place we don't mind spending time anymore. I even feel like we can finally add some artwork to the walls without completely overwhelming the space.!

I have a lot of fun ideas for upcoming toy rotations. My plan is to rotate every 2 weeks. I hope to share the rotations with you so you can see how rotating toys works (or doesn't work) for our family in the long term. Be sure to check back!

Linking up to some of these great parties!

Sunday, November 7, 2010

Room Redo - Wild One's Nursery

Next up on the room redo list was Wild One's nursery. Since the furniture was already in the room, we kept the basic layout the same, just changed the paint color and accessories.


Her crib and bookshelf (the white spot is where we have her vinyl name wall decal - it's the same shade as her curtains).


Where we spent a lot of time rocking our little one. My favorite accessory is the wooden rainbow stacker on the wall shelf. We ordered it from etsy and the colors are just SO vibrant.


Her dresser/changing area with shadow boxes above them. I'm embarrassed by how long it took me to finish the shadow boxes. They are such an easy, quick project.


Close up of one of the shadowboxes


Her birth announcement and footprints


This one is my favorite.


All 3 in a row.

Thanks for looking at our rooms! This winter I'll hopefully have some pictures of our finished basement playroom/living room. I'm waiting until we get the centerpiece put in - our big screen tv!

Tuesday, November 2, 2010

Room Redo - Chaos's Big Boy Room

First a note of business - due to the busy holiday (and in this house - birthday) season approaching, the Friday Felt Fun Feature will be on a temporary hiatus until after the new year. I will still be posting some felt projects from time to time though. I have a lot of fun Christmas felt projects I'd like to try if I can squeeze them in amongst all the other projects.

Now on to today's post...

I was hoping to be 100% finished before I posted these pictures of Chaos's big boy room, but since finding out Baby #4 (who I have nicknamed Sprout for blog purposes) is a girl, we're rethinking bedroom arrangements yet again (sigh). So, I better show these pictures before it becomes a girly room.


The view as you walk in the door. When Chaos moved into this room he was still in a crib. He has since transitioned to a regular bed so we've taken down this crib. It leaves a lot more room to play!


Looking left from the door you see the first of two closets, his Ikea bunk bed and (my favorite part of all) the magnet boards from Ikea.


His bunk bed. The bedding is from Land of Nod. The rocking chair in the corner was my husband's when he was a child.


The bunk bed does have a ladder of course, but we took it down until he is older. For now, he sleeps on the bottom bunk.


Standing next to his bed and looking to the opposite side of the room.


Another shot of the window nook. he has a small chair and his wooden firehouse/dollhouse (that is awesome, btw) in this corner. You can also sort of see his dresser on the right.

Thanks for looking! Look for Wild One's nursery later this week.

Monday, March 8, 2010

A Nursery Project

We have been ever so slowly continuing to work on our room redo. Chaos has been moved to his big boy room (though not the big boy bed) even though the room isn't completely finished.

With the nursery freed up, it's left room for me to start working on a few little projects. When I bought Wild One's bedding set, it came with one matching valance. I knew I had no plans to use it as a window cover since 1) there are two windows in the nursery and 2) we prefer full length drapes for a darker room.

So...how many things do you think I can make from this one valance?


My first is a nightlight. We had an old Dora nightlight lying around that had long ago lost the picture insert. I cut a small piece of the valance to fit inside and now I have a cute (free!) matching nightlight for Wild One's room.


More projects to come...

Sunday, December 27, 2009

Room ReDo Update

I haven't posted much lately on our room redo. I had (very) high hopes of having the entire project completed before Wild One made her appearance. No such luck. We still have a lot of work to do.

I thought I'd share a few pictures of what we have done and what we have planned.

The Basement Playroom
The basement has been dry walled, carpeted and painted. We have started moving some furniture in, but we have more to buy, and the doors and trim have yet to be installed.

My favorite parts of the basement:

The dress up area (inspiration here). The kids play dress up so much more now that they can see all the clothes. Before they were all crammed into that red trunk. Now the tote holds all the accessories - crowns, pom poms, jewelry, purses, scarves, etc.


My craft area!!! There are no words for how excited I am about this. We bought this storage unit with the attached desk from Ikea (expedit). I'm working on getting all of my craft supplies (neatly) put away, hence the stock photo. :)

Chaos' Big Boy Room
We're still in the process of painting and installing closet fixtures. I also hope to change out the lighting.

We bought this bed from Ikea (the ladder will be removed until he is much older).

The bedding is from Land of Nod.


My favorite part of his room are the magnet boards we will hang on the wall opposite his bed. He has some awesome magnetic blocks that will be a lot of fun to play with here. I'm also hoping to recreate this artwork using these wall cards by eeBoo.


Wild One's Nursery
We haven't even started it yet. Sigh. We need to get Chaos moved into his new room before we can begin. Baby steps...baby steps...

I hope to at least start the shadow boxes for her room before the year is done.

Tuesday, August 18, 2009

Room Redo Cont'd - Chaos' Nursery

The (current) final installment of my room redo series.

Chaos' Nursery:

Long before we ever became pregnant, we knew that if we ever had a little boy we would have an airplane themed nursery. Thankfully while we were expecting Chaos we found a great bedding on clearance at Pottery Barn and from there the room was born. We kept the layout the same as with Pinky's nursery, but the feel to the room is much different.


Airplane bedding in the crib and a small chair from our local consignment shop.


Scanning left from the crib. We think every bedroom should have lots and lots of books!


The glider and side table. We spent many, many sleepless nights here with Chaos. The shelves about the glider are the same from Pinky's old nursery.


The wall opposite the bookshelf holds the dresser which doubles as a changing table and the shadow boxes I featured in another post.

Since we are currently in the midst of redoing all the rooms, this is the final installment of my room redo series for now. I hope to be back soon (at least before the baby is born) with pictures of our new family room/playroom, Chaos' big boy room, and Wild One's nursery. Thanks for looking!

Tuesday, August 11, 2009

Room Redo cont'd - Pinky's Room

The continuation of my room redo series.

Pinky's Big Girl Room:

Just before Chaos was born, we gave Pinky her own big kid room. We kept the room a secret and unveiled it on Christmas Day as her big birthday present. We wanted the room to be cute and girly, but not themed. I think we accomplished our goal pretty well!


Pinky's daybed (Tromsnes from Ikea). Above her bed are wooden letters spelling her name (photoshopped out). The bedding is too cute and is the Zoe quilt from JCPenney.


Looking from her bed to her window nook. The table and chairs have gotten plenty of use and were a great steal on clearance for under $20 at WalMart. The curtains are tie up roman shades that look adorable all tied up during the day. Too bad I waited until night fall to take pictures. Oh well.


Closer view of the pictures above the bookshelf. We found these awesome prints at TJMaxx for a steal.


Scanning right, past the window nook. We are blessed with very large rooms in our house so there was plenty of room to add some toys to Pinky's room.


Scanning further right, still standing in the doorway. The sign on the wall reads "The Princess Sleeps Here."


Standing in the window nook looking out. The dresser (Hemnes from Ikea) is a great, sturdy dresser that holds an amazing amount of clothes. Mr. Handy made the shelf above the dresser years ago. It had been stored away forever, and he just put a coat of pink paint on it and it was perfect for the room!

I love this room so much, for so many reasons, but one is that it has 2 closets (well, 3 if you count the cubbyhole that we use for storage). We use one for her clothes and one for additional toys. As she gets older, I'm sure she will need the extra closet for all of her clothes!

Tuesday, August 4, 2009

Room Redo con'td - The Playroom

The continuation of my kids' room series.

The Playroom (soon to be Chaos' big boy room):

This room was tricky since it was already a nacho chip color and we really, really didn't want to repaint. We compromised and pained one window area light blue and green and put up a paint by number mural (really, very easy to do).


Looking in from the door to see the infamous ball pit. We've thought of stashing it away quite a few times, but the kids just love it. We hung all of the posters in the room at a level where the kids could see them and touch them. The posters all teach a basic skill - numbers, shapes, colors, and days of the week. We also have a great calendar that the kids can update with the days of the week, the weather, month and season (on the left, above the dress up trunk).


Scanning left, with a better view of the calendar.


Looking left from the door towards the painted window area. The paint by number mural is on the school bus painting on the right. The chalkboard schoolhouse was done with a picture I found online and a borrowed projector.


Left side of the window area showing the chalkboard, drawing desk and toy storage shelf that my talented husband built himself (for very little money - around $40).


The paint by number mural. This was in the early stages. The blue square in the middle was supposed to be where you added a cute school name. We were unoriginal and eventually painted it yellow like the rest of the bus.


The schoolhouse chalkboard. So easy to do with just a computer scanned image and a projector that Mr. Handy borrowed from work.


Looking back towards the door at the second toy shelf (also built by Mr. Handy).

There is one more window nook area in this room that isn't pictured. It's nothing exciting, just a gated off area for our computer and desk. The adults needed a little space in this fun room too.

I know this room is a bit bright and over the top, but honestly kids just love it. Our new playroom will likely be toned down quite a bit from this room since it will be sharing space with a new family room, and honestly, I am a little sad about that. I hope that even with more muted colors and decorations the kids still enjoy it.
Related Posts Plugin for WordPress, Blogger...